Thursday, February 20, 2014

eP eTeam Picks Challenge and Valentine Winner

I don't always have the chance to play along with eP challenges but when I do....watch out! Andiepants in the house!

Altering a bag. hmmmmmm....I've done this before. Didn't turn out so well, so here was my chance for redemption.

First, I dug out this Master Cam bag that my hubby brought home from a machinist trade show about a decade ago. 


I decided I didn't want 2 handles so I started by using my seam ripper to remove the handles that were sewn on.


To color the handles I soaked them with water first. This allows the mist to spread more evenly over the fabric. Next I sprayed my Dylusions mist in Vibrant Turquoise generously over the handles so they were well covered. You may want to use gloves. I did not :(

In order to cover that gawd awful picture I decided I would cover the thing in gesso. Remember when working with fabric to place a piece of cardboard in between your layers to avoid bleeding and soak through. Here I just used an insert from a 12x12 Prima mask.


Cover generously with gesso. If you feel you need more coats make sure you dry thoroughly in between coats. Honestly I remove the handles and covered in gesso before dying the handles in order to give my bag some additional air-dry time.


Once covered to my liking I then used Distress paint in Broken China to color the background. after that was dry I sprayed some Vibrant Turqoise in order to allow some congruency to the piece. I did this to both sides of the bag.


You will want to do the handle next since you need to reattach it to the bag. Make sure your sewing needle is a large enough gauge to handle the material of the bag. I sewed my to pieces together to make one long handle, sewed a piece of trim down the middle, and then sewed each end to the seams in the bag.


You can see here where I attached it on the inside.

The rest is just like scrapbooking! For the front I adhered a piece of burlap using gloss gel medium in various areas. I adhered the large lace at the top using the same method and allowed that to dry. Arrange your clusters and take photos so that you know where to put them when you're ready.


Next I used Wendy Vecchi embossing paste in black through a Martha Stewart silk screen to attain the large black shape (Above) and the smaller one coming out of the bottom of my cluster. I then adhered the flowers with fabric glue in my hot glue gun and I sewed the small blue Prima baubles  on by hand in the bottom cluster, top cluster and across the lace.


For the back side, I gave a good coating of water and then added more Dylusions in Calypso Teal and Dirty Martini. 


I first added all the lace piece using the gloss gel medium and let them dry. You can add dimension with your lace as I have and the gel medium will allow it to dry stiff and hold it's shape. Next I used the Hollyhocks stamp with Stazon jet black ink


and added a script stamp in Stazon Timber Brown. Notice that I even stamped on the lace. It's subtle but a nice touch.


I used a leftover scrap of cheese cloth to make a rosette with a slight tail, added an altered flower that was leftover on my desk, a random button that was sitting there, and finally added the Prima border. Again I used gloss gel to adhere the Prima border so that it was sure to stay.


I definitely think I've redeemed my prior shame of altering a bag. I quite like this one.


And for the giveaway...


The random winner is Geri!!!!  Please email me your address at tiggertoo57@gmail.com.

Thanks so much

{{hugs}}
Andiepants


Saturday, February 8, 2014

eP Get Altered Challenge and 7Dots January Challenge

Get ready to be shocked...I love 7Dots! 

*GASP*

I know right? Anyway...I purchased Messy Head through the Swirly boutique a while back on an impulse. I'm not a big pastels scrapper but I figured...eh! why not.

Of course...I fell in love. What is with this paper company?! For realz! The brick wall patterns and splatters are  instant faux texture on your page. Anything you layer on top just makes it that much more fabulous. 

7Dots has a monthly challenge over at their blog. This month was geometric shapes. Instantly my tiny circles template came to mind. I had to use it!!!


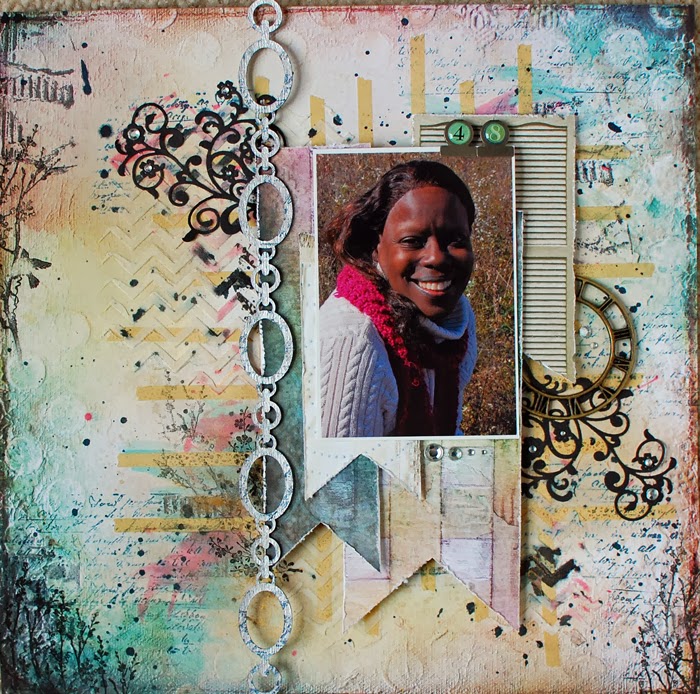
This is a photo that my GF Kim took while she was here scrapping for the weekend. I was coloring flowers and didn't have any protective gloves.

 I decided I wanted to do something monochromatic so I stuck with pinks and only added black and white to accent the photo since my shirt was black and white.  I used the Kaisercraft gems to accent the pink on my fingers in the photo. The clock is Prima and covered in gesso and the doily is Kaisercraft as well.


This photo illustrates the texture created with the tiny circles stencil. LOVE IT! I used Wendy Vecchi paste in white through the stencil. The detail is amazing. The resin piece is from my stash and I did some rarely seen stitching with my sewing machine. I love the look but the time to clean off the sewing table, thread the bobbin, and then the jamming...THE JAMMING!!! Happens whenever I sew on paper. I'm a paper crafter gals...not a seamstress;)


Here you can see the doily stamp that I used randomly all over the page to accentuate the circle motif. I've  had these little metal frames FOR-EV-ER and when I realized I was doing circles....they were perfect. I used the salt and pepper letter stickers from 7DOTS Domestic Goddess for the titles and placed my pop dots under the stickers to lift the letters. 


For the eP get altered challenge we were to alter playing cards. I made this little trinket for my hubby...52 reasons I love you.


The cover is actually cut from cardstock and added in but is not actually a playing card. I used an older line from Echo Park that has been in my stash for the cover and the numbers on the title. The banner is stamp which I fussy cut.

I used basics for this since I was doing an entire deck. Gesso, mist, a little washi tape, and a permanent marker.


Started by covering each card with a layer of gesso. Then I laid out as many cards as I could on my spray mat and sprayed with dylusions mists in calypso teal postbox red.


Because the pattern which I laid out the cards was random the mist for each card was random.


For the last card I had originally set this one aside to make the cover and then realized I would not have 52 reasons!!! By this time I had put away all my mists so I used some of the washi tape that was on other cards and made the last card different


I hope you enjoyed my projects today.

Don't forget to leave a comment on my giveaway post for your chance to win a Time Holtz layering stencil. Winner will be chosen February 14th.

{{hugs}}
Andiepants


Wednesday, February 5, 2014

Valentine's Giveaway and 7DOTS Domestic Goddess

I can't believe it's February already...but you know what that means...

VALENTINE'S DAY!!!

And what would Valentine's Day be without hearts and love and 

BLECH!!!!

However, in the true spirit of valentine's, I decided to create a LO of my darling daughter and use the gorgeous Domestic Goddess line with all the glorious reds and pinks.


I adore how this LO turned out. I'm not much of a red scrapper so I was really surprised at what ended up on the page. 

 Here is a closeup of my fussy cut pieces. I used the Raspberry pudding paper from the Domestic Goddess line and fussy cut some of the lace shapes. The clock is piece of Prima packaging and the bling is a piece of Prima cut into various sections.

For the cluster up in the corner I used a Tim Holtz layering stencil and a Kaisercraft script stamp over it. Layering the inking is one of my favorite techniques. The Chipboard piece is Dusty Attic and is covered with Art Anthology Dimensional velvet. This stuff is FANTASTIC!!! Kim carries all sorts of colors in the eP store! Just click on the link on the right side of my blog under "supplying your obsession".

For the large heart piece of DA chipboard I used the dimensional velvet again and then sprayed with Lindy's in Poinsetta red gold. I made it darker on the corner to more splattered here on the edge and then went over the bottom edge with distress ink. I love faded effects.


The flowers are Petaloo and were originally pink but I went over them with Silks glazes in Va Va Voom red to make this dark rich color. So much fun to customize my embellies.

And now I have a special Valentine treat for you. I have a Tim Holtz layering mask to give away to one lucky person.


All you have to do:
1. Become a follower of this blog (if you aren't already)
2. Like eP on Facebook or Pinterest
3. Leave a comment on my blog here

I will choose a winner via random generator on February 14th!

Good luck!

Sunday, January 12, 2014

Mixed Media Layout with Ninth Wave

Can I just start by saying how much I adore the 9th Wave collection from 7Dots Studios?!  The colors are wonderful and the textures in the background allow for multi dimensional layouts with less bulk to your page. Something any 'chunky' scrapper, like myself, lives for.


The bird bath resin piece is from Prima. I've never cared for it personally but was determined to use it and I just adore the way it turned out. The brick texture stamps along the edge are by BoBunny and the ticket stamp is Prima. I honestly don't know the name of the company where I got my arch window stamp but I LOVE them. 

Thanks for stopping by and make sure you hop over to eP to participate in this months get altered challenge - hearts and tune in Thursday the 16th for the eteam picks challenge for your chance to win.

hugs
Andiepants

Monday, January 6, 2014

Blue Fern and 7DOTS Giveaways

2014 has come in like a lion. Negative 20 degrees and 4 ft of snow...this is the worst winter we have had in decades. However, it brings snowdays, the smell of rustic soups simmering on the stove, creamy hot chocolate in our bellies, and board games in the middle of the day while the wind whips and whistles it's way around the house. 

As for my scrappy world...here is a layout of my absolutely stunning friend Kim.


I used 7DOTS 9th wave papers and stamps from Bo Bunny, Prima, and Tattered Angels. The chippy piece is Blue Fern and the die cut is Spellbinders. There was quite a bit of layering added to this page but I just ADoRE the 7DOTS papers by Finn because there is so much texture already in the background. The ink splatters are inspired by Adrienne Ford. She is a wonderful artist and designer for Prima.


With 2014 the scrappy world has exploded in the anticipation of Winter CHA. Make sure you check out the release of 3 new collections by 7DOTS studios. They have something for everyone and their collections are amazing. 

Here is my favorite


Once released you will be able to find some of these collections in the Eclectic Paperie store! 

To access the eP store just click the link on the right of my blog under "Shopping-enabling your obsession"

Blue Fern studios has also decided to try their hand at paper! Click on the link to access their site and leave your blog link for a chance to win these beautiful papers. I just adore these gorgeous soft colors and the large images perfect for fussy cutting and layering. Reminds of me Webster's pages. Here's just a sample of one of my favorite pieces.


Here's to a wonderful 2014. Hope you were inspired and head on over to 7DOTS and Blue Fern to enter in their giveaways.

{{hugs}}
Andiepants

Saturday, December 14, 2013

Wendy Vecchi embossing paste and a Swirly Challenge

Welcome to December!!

WHAT?!

I know right?!

At any rate...mojo took a vacation and now she's back. It's been a really tough month creatively, however I got the privilege...nay the honor...of chaperoning for my 2 oldest boys electronics weekend for boyscouts. 

How on earth does this relate to scrapping?

Well, one of the committee members happens to be a scrapper too (and a pretty great gal to hang with), so she and I were talking one year and decided that the chaperones would scrap while the boys played with their electronics (aka video games). 

Of course walking into a full on weekend after a month's hiatus and no mojo is a pretty daunting experience. Never-the-less I emerged with this:


My brother was just married in June and what a better Christmas present than a home made inspirational canvas for him and his new bride to hang in their home. 

This was also the project that I was able to use for the eP 12 days of Christmas. We were promoting Wendy Vecchi embossing paste...and just what do you think is ALL OVER this canvas?

Make sure you click on my shopping link on the right to head over and check out the special deal for the day!

I adore the combination of colors on this canvas and the way the colors seep into the embossing paste. The tree is actually a piece of Fab Scraps Chipboard from an odl Swirlydoos kit! Crazy huh?

I used Prima's Finn line of vintage papers for the background with TH tissue paper, some washi tape, and some drywall tape. All of my paper flowers are hand cut and made and the zipper flowers are from a roll purchased from Melissa Frances. 

The brown tones on the lower right side are the Donna Downey Unity stamp that I purchased through eP. It's gorgeous but I was a little disappointed that it ran. I do love the shadowy look witht he stark stamping of the black images. What a contrast.


For the lettering I spritzed with smooch so they would stand out from the background a tad. Again I used another piece of Finn paper for the letters which is where the font you can see peeking here and there came from. The quote is actually from a stamp set that I own but I don't remember whom they are quoting.


I finally decided to pop in over at Swirlydoos and see what was going on with my swirly sisters. 

When I saw that my girl Kim was hosting a challenge...I knew I had to join in. What better way to keep the mojo going?

For the November swirly girls challenge we had to use everything but the kitchen sink. No less than 4 different mediums and it had to be inspired from your fav artist. Of course my fav artist is Finn...always has been.

She posted a blog post about a new blanket she bought and fell in love with that inspired her pages. How ironic that I just bought a new fluffy Sherpa blanket that I am in love with too!


This would be my color inspiration for my LO along with Finn's style:


The brown Dylusions spray turned a tad bit rusty colored on this LO but I still love the rust feel of it. All the layers, and the metal, the chipboard, the paper, the pearls....plus that photo!!! Cutest kids EVER!!! (If I do say so myself)  I forced them out to Stepping Stones Falls for a photo shoot one night after school. It was getting dark fast but they all were very good sports. From the photos I have deduced that mommy needs more work with her camera.


I hope you enjoyed the re-emergence of my mojo. I still haven't shared all the lovely creations from my weekend with my eP cronie Erin in WV so there will be lots of blogging to come.

{{hugs}}
Andiepants

Sunday, November 10, 2013

Eclectic Paperie Get Altered Challenge

That's right girls...here's another inspiring challenge from eclectic paperie. This month we are focusing on art dolls. Personally I find paper dolls gorgeous and so versatile. There is so much that you can do. 

To top it off the world of paper dolls in art is HUGE!!!There is no set standard and no one way. Just google "art doll" and soak in the plethora of inspiration that assaults your visual sense. 

When I heard about this challenge I immediately knew what I wanted to do. It was kissmet that I was traveling all the way to West Virginia that weekend to hang with my fellow eP DT gal Erin Smetak!! She had just thePrima doll stamp that I was looking to use:

 I wanted to place mine on a canvas so that I could use various color and texture techniques. Erin and I had just gone on a shopping spree and purchased tons of lace, some canvases, and when I saw the wooden Angel sign...I knew it was for my doll. Thank goodness I had packed my resin wings.


 I wanted to cover my sign with my antique linen distress glitter but alas...I forgot to pack it. Instead I used Distress Stickles in Rock Candy over my pre-painted sign.  I painted the sign with Silks glazes (Pink Azalea) and sprayed with tattered angels glimmer mist.

I painted the edge with silks glazes to start and then covered with Kroma Crackle. Then I went over it with a prima stencil and some Wendy Vecchi embossing paste in various areas. I was trying to disguise the fact that I used the back of the canvas. The doll was too small for the canvas itself and the frame lent a smaller work surface and thus a better proportion to my art doll stamp.


For the background I layered lace, with drywall joint tape, and Pink Paisley coffee filter words. I covered with gesso and sprayed with TA glimmer mist and some Lindy's Stamp Gang Starburst in Creme Brule' (which is how I got the GORGEOUS tone of the dolls skin).  The flowers were mostly cut from Webster's pages Postcard's From Paris II line and then sprayes with the same mists to give it a congruent look.


I hope you enjoyed my art doll. Pop over to the eP blog to check out the original inspiration and the other DT's take on art dolls. 

xoxo,
Andiepants