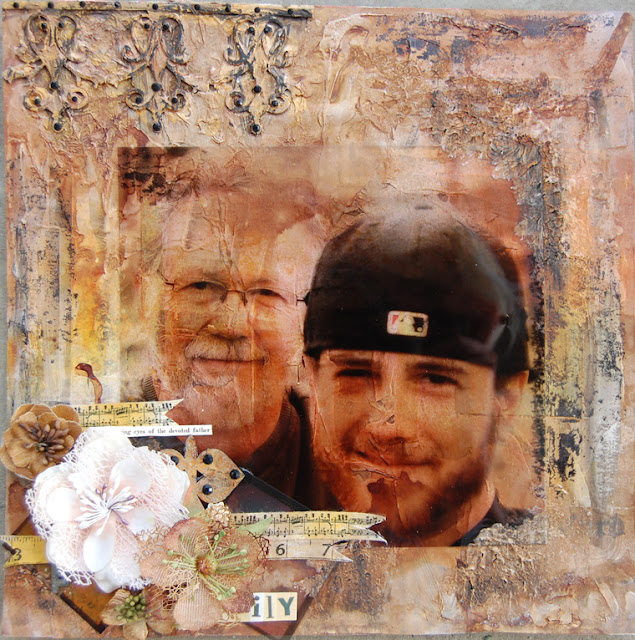
What a fantastic week! The family and I spent time up in Mackinac and I got 2...yes 2 additional layouts made. I'm so excited to share these these with you.
This page was just sooo much fun. There are so many layers of paper and gooey texture that I don't even know where to begin. All the papers underneath are from the Swirlydoos kit club Brass Shilling. I used up all my scraps and then used some scraps of tissue paper for added texture. Once all the matte medium was dry I covered everything with a layer of modeling paste randomly and in varying patterns. In the future I would do it thinner in some places so that the paper shows through more. Then I covered it with a layer of gesso. Again...I think I'll go a little less next time.
I loved the transparency pieces that came in this moth's kit. I felt that I wanted to carry that theme into the picture by printing my picture on a transparency as well. I liked how you can see the texture through the picture as well. I used TA mists in Sunflower, Coffee, and Suede. Liny's stamp gang moonshadow mist in Burnished Brass. I then went over everything with a black gelato and just used some water to blend. The black distressing is a stamp by Kaisercraft and stamped with Stazon ink.
Here's a closeup of the chipboard piece up top. I used the Silks glaze in Emperor's Gold before the gelato just to accentuate the area.
This is a page that I made for the round robin challenge over at Swirlydoos.com. The first person creates a layout and posts it at the end of the first week and then the second person has to "lift" that LO. This is my lift of week one.
I tend to not like titles. This page is a mix of Swirlydoos kits including Brass Shilling, Au Naturale, Vintage Chic and Midnight Waltz.
This chipboard piece is by Dusty Attic and covered in Lindy's Moonshadow mist in Burnished Brass and Tawny Turquoise. The stamp was included in this months kit, Brass shilling. The metal corner up top is by Making Memories but is from my stash.
Just a quick close up of my cluster. Here's a quick tip...I used Score Tape to adhere the ribbon. You can't even see the tape underneath the sheer ribbon. It's super fantastic.
Last but not least, here is a video tutorial for altering chipboard just one more way!!!
TFL,
Andiepants


Wonderful layouts - the texture and colors on the first one are really amazing (gorgeous techniques used!)
ReplyDelete