Tuesday, May 3, 2011

Success....on a small scale

It's finally over. The Scraptacular came and went and was a total success. A big thank you to all the vendors and volunteers who SHOWED UP to help. Today I am actually home sick. I woke up with a sore throat and feeling run down. I think everything has finally caught up to me and my body is giving in. I will take a day of rest (regain my voice which I lost this morning) and jump back in tomorrow morning.

Another success this month was starting back into belly dancing after my surgery. I have retained all the muscle memory but the diaphragm is GONE, the endurance no longer exists, and I cannot stretch my abdomen like I used to. I will be unable to perform at the Everyday goddess Hafla May 21st as I told my friend I would, but I will be there to support her. I am working toward re-gaining all that was lost in the months following my surgery and I have to say....it feels so good to be back.

Yet another success was I finished the CHANGE class to patch into HIM (Hogs in Ministry).  This will be a great way to do God's work and help lead people to the lord as well as create a conduit for hubby and myself to maintain our relationship. I'm so excited to see what God is calling me to do with HIM.

Last but not least, I met my scrap booking goals. I finished 3 layouts this month which is absolutely amazing for me. Is it bad when you have to set goals so that you actually do your hobby?  I had a layout for a fourth contest and was trying to complete it at the Scraptacular but I was too busy and time fell short. I will still finish the LO and post here when done because I truly have outdone myself this time. (not that I'm tooting my own horn or anything;)

This is the page I submitted for the chipboard palooza contest over at Swirlydoos:

 The frame around the large  picture is chipboard, the flower, and the frame around the sign are too.  The paper in Simplicity by fancypants. I designed this page for the chipboard palooza contest over at swirlydoos.com.  I was really happ with the way this turned out and had a blast doing it too. 


Here are some close ups of what I did to the chipboard. The large frame is painted blue and then covered in Modge Podge mixed with mica poweder. If you take powder on your brush and then grab some Modge Podge it gives it this chunky grungy look that is just fantastic. It's really hard to see here. I then covered it with 2 coats of UTEE (ultra thick embossing enamel) While the second coat was still hot I took a rubber stamp which I had already covered with Smooch ink, huffed the stamp, and pressed it into the hot UTEE. The result was this embossed image that really gave the frame some dimension. The flower is just covered in Smooch, the center is glittered, and backed with paper. The smaller frame is done with a masking technique. First I covered the frame with Xyron adhesive. Then I used my Tattered Angels iron works mask and pressed it onto the frame. Covered with glitter, removed the mask and covered with a second color of glitter. Make sure that you are pressing the glitter with your finger so it stays.

My final LO was for the round robin challenge over at swirlydoos but I haven't taken closeups of that page yet so I will save that for another post. 

Please check out the link for the everyday goddess belly dance workshop in Clio Michigan. I know the instructors personally and they are all fabulous ladies. If you click on the photo gallery you will see pics of me dancing too;) The workshops are for beginners who have never danced before so check it out. Hope to see you there;)

Andiepants

Friday, April 15, 2011

Jelly Bean Belly...

Another week and I did meet my goal. You can view my page for the chipboard challenge over at Swirlydoos.com.  However, instead of posting everything to both that site and my blog, I have decided to share a little more Scrappy goddess today. While I was pregnant with Colin, back in 2001, my loving hubby decided he wanted pictures of my belly. Being the loving hubby that he is, he did not quite notice that he was getting more than my naked belly...if you know what I mean! Suffice to say, I ended up with these gorgeous black and white film photographs of my pornographic pregnant body. I was dying to scrap them but how was I gonna keep the girls out of the photos? 


This was my second attempt at using cardboard. I LOVE it! I loved the corrugation and the layers of paint and glimmer mist and stamping...This page was a blast. I was actually inspired by a lady's shirt when she came into my office. Teal, lime green, black, and white. And of course...covered in swirls. I took a picture of just her shirt with my phone. I think she thought I was crazy.


 These are chipboard letters that I've had for years. I won these seed beads at an auction and loved them but was clueless how to use them. I used 3M spray adhesive to attach them and then sprayed it to keep them in place. 


 This is another view of the letters. You can also see the paint on the pictures. The paint and strategic placement is how I made up for the indiscrete photos:)


 This is a piece that I found at Joanne's in the jewelry section on sale. I loved these things and to me they were corner pieces. 


This is most favoritist part of this whole page. I love these giant grommets which I picked up in a discount bin. I used glimmer mist on the piece of guaze and attached rhinestones.  The little black piece is actually a magnetic hidden journaling thingy. Watch this...


TADA!
 I used it to write the story of how my 3 year old son, Roman, told my in-laws that they were going to be grandparents. It's still my father-in-law's favorite story. 
Nathan and I were living together but not married. We were both in college and broke as a joke. He had just gotten out of a 2.5 year engagement and his parents were a little skeptical of me. Needless to say pregnancy was not the best thing at this point in time. My loving hubby (boyfriend at the time) and his 2 brothers excused themselves from dinner to hang out in the garage,  so it was only my in-laws, Roman, and myself still sitting at the table when Roman blurts out..."my baby brother is just a jelly bean in my mommy's tummy right now!"  I wanted to die. I just stared across the table at my father-in-law (who resembles Grizzly Adams, owns a very large assortment of guns, and loves nothing more than riding his motorcycle) in complete horror. The blood drained from my face and I thought I was going to choke on my food. Roman was smiling happily and continued to discuss what life as a big brother was going to be like. At that point my father-in-law started laughing because of how panic stricken I was. Needless to say we are one big happy family now and of all people...Colin most resembles my father in law.


Saturday, April 9, 2011

Faces of Sue

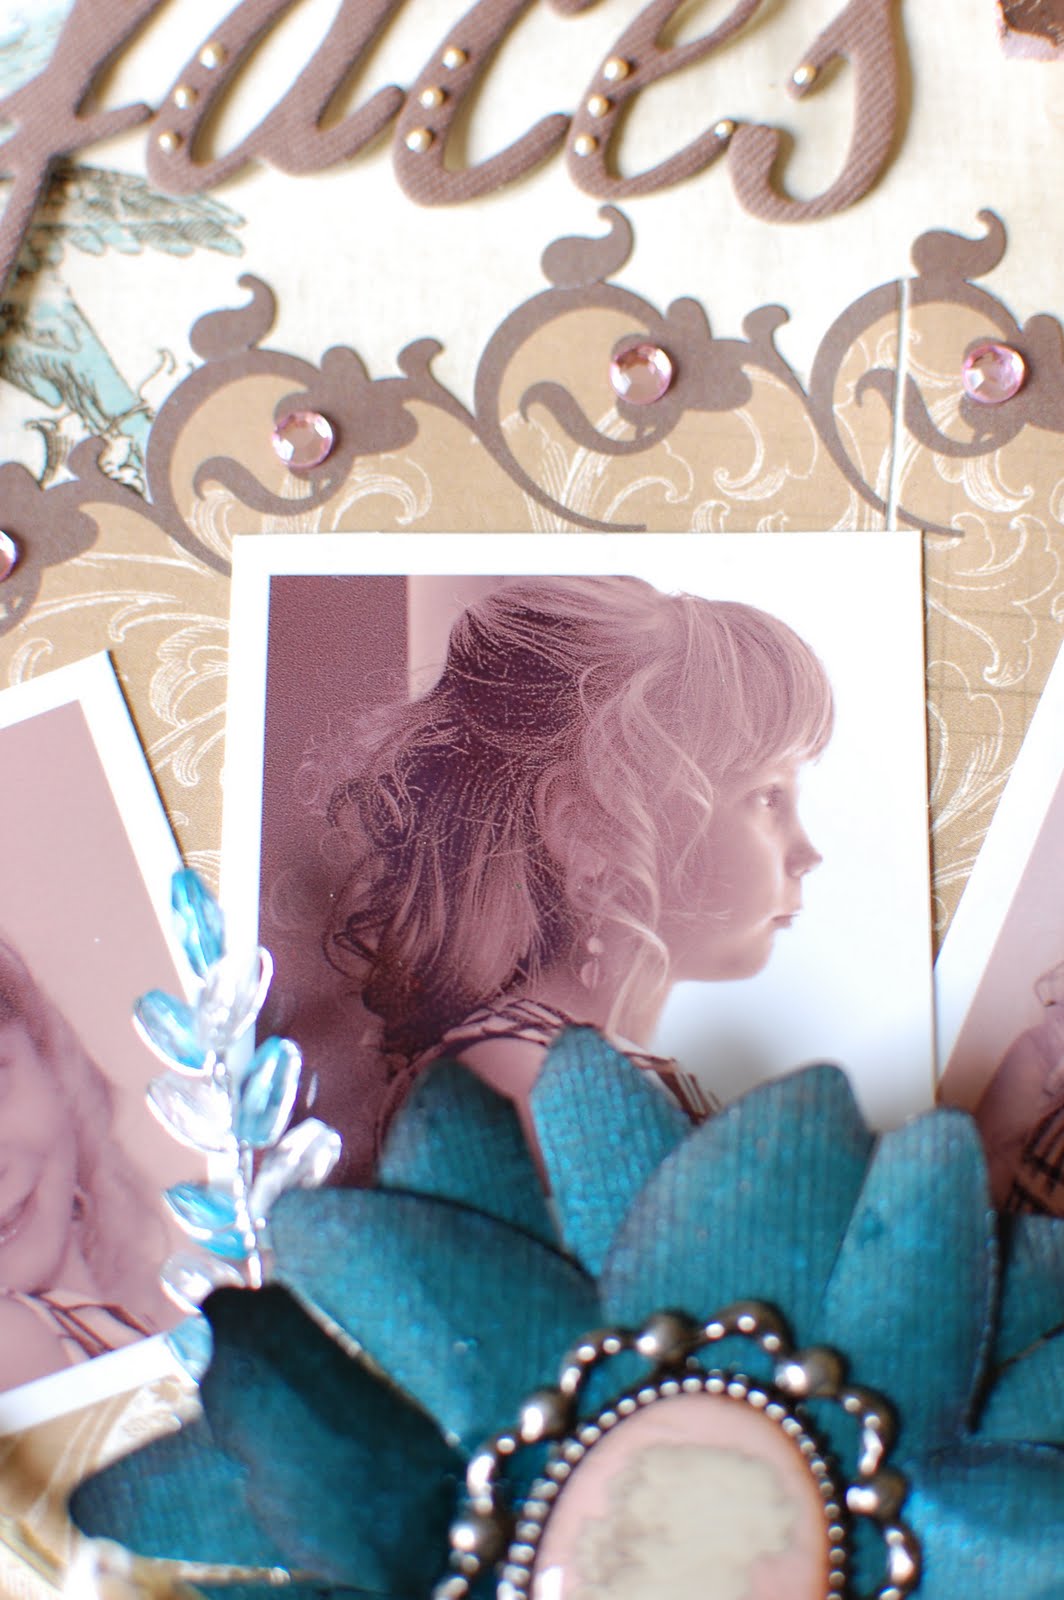
Here is my latest and greatest...Faces of Sue. This LO was made with the April Swirlydoos kit Bella Volo. Isn't it fantastic. I am absolutely in love with these uber romantic papers from Bo Bunny. Anyone who knows me KNOWS I am not the romatic like type...but I'm growing. My goal for this month is to complete 3-4 layouts and to blog at least once a week. Here's to the start of a great month.


 Here is a closeup of some more hinges that I made. Also you can see where I wrapped the crystals branches around to fasten them.


 This is a closeup of a rosette that I made. My belly dance instructor had a giant bag of tiny silk scraps from her sewing of veils and skirts. Most of them are less than an inch wide. I have been dying to use them but had no idea how to use them for so long. I am so excited. I may even begin to make multi colored rosettes.  OOOOOO....hmmmmm.....


 Can anyone say Martha Stewart deep edge punch?! OMG I love this thing. Originally I had used a paper bleaching technique with this word stamp on the edges but I was a punching re re and it looked awful. I didn't get anything to line up right. I didn't feel like turning on the iron and doing the paper bleaching all over again when opaque Staz on ink would give the same type of feel. I also sprayed the edge with Tattered Angels glimmer mist in the color coffee. It's very beautiful up close but doesn't come through on the picture real well. Also, getting better with the water distressing technique. Although you have to let go and let it form on it's own, you also can kind of control what the outcome looks like if you have a general idea. I'm getting to the point where I can first have a plan with it and that's just got me all kinds of happy. If you haven't tried it, check out the tutorial on Swirlydoos and give it a go. You may be pleasantly surprised with what you come up with.


 This pic shows so much. The swirly chip board underneath is by Mya Road. I  didn't have the right color peach so I mixed a peach and pink together to make it a tad more salmon. The color was perfect. I then used about 6 layers of UTEE(ultra thick embossing enamel) to give it the shiny raised texture. I tried to crackle it but apparently I would have had to add more because it just bent and flexed all over the place. It looked just a little to bright so I grunged it up a bit with some Tim Holtz distress ink in antique linen. The green butterfly is done with liquid glass, some black stickles on the black areas and cut pearls from a long thread out of the dollar bin at Joann's. I have about 8 yards of these little pearls on a strand. It's great because you can cut them to use individually (as you see here) or keep the strand as a whole (which is coming soon. I had a fabulous epiphany this week and then topped it off with another last night for a future layout...coming soon)


 The letters were included with this month's kit. They just felt so plain. The paint is Ranger Liquid Pearls in Bisque. It really dressed up the letters and made them that much more romantic.


 This is my favorite picture from this series. It's also a close up of the flower. The flower is actually from the Pagoda Cricut cartridge. It's a spiky 5 petal flower. I cut the petals apart and then cut them in half. I rolled them and inked the edges with dark brown pigment ink. I then sprayed the flower with TA glimmer mist in patina. For a tutorial on the flower you can head over to Swirlydoos. Yeah, I totally stole that technique;)


Last I just wanted to showcase the liquid pearls on the peach  butterfly. If this photo makes you swimmy in the head it's because I too the photo sideways to get the right lighting on the butterfly and then rotated the photo in the computer. Sorry. I love this close up because you get a little bit of all the page elements all at once.

Personally I am mimicking the techniques and layouts at Swirlydoos in order to incorporate them into my own style. Since this is only my second layout it is still very Swirlydoos and not a whole lot of Scrappygoddess. The only way I can learn and be effective is through critique. Please feel free to leave comments about what you like, what you don't like, and what you think needs to be done differently. Any and all help is greatly appreciated. Thanks for looking.

Saturday, April 2, 2011

Where I create

Tonight's blog is pictures of my scraproom. Ah yes...that coveted secluded corner of heaven that you can call yours and just yours alone. Cram packed with all of the wonderful goodies, sparklies, and scrappystuff that has been hoarded for years and years.
Mind you, this is still under construction but it has come far enough in the last year where I feel I can share with pride.  Unfortunately with the flash on the camera the color washed out and looses it's warm inviting feel. But please feel free to use your imaginations.
 I get most of my decorating stuff at Hobby Lobby when they are running a sale. Fabulous!!! I did the header over my window with my cricut. It says "inspire" It was my first attempt with the vinyl. Can anyone say youtube? The color on the walls is Pittsburgh Paint Canyon Blue. It's actually a very dark blue...not the robin's egg color that is showing up in these pictures.


This is a closeup of my clip-it-up. As I was designing this room I realized that my biggest problem was out of site, out of mind. So I use the clip it up for all of my miscellaneous items that I want to use but aren't likely to. I'm big into paint and sprays so I'm always reaching for those. But the little sticker and such and tend to forget about. 


 The sides of my desk are cut away cubbies. I love having items within easy reach.


 All of my printed photos are in the boxes. The tool bag is my most ingenious idea EVER! I keep this handy little thing packed with all the must have tools. See the white circle beside it? That is a lazy susan and the tote fits perfectly on it. Whenever I come in to scrap I grab the base and the tote and put them up on the corner of my desk. If I'm off to a crop...I never have to worry about the basics. They are always ready to go. Take my little lazy susan and voila! Everything within reach no matter where you are and with minimal use of your cropping space.


Behind my desk on the lower shelves of the cubes I have all of my publications, albums and my 2 bags of scrap paper so everything is in easy reach.


I took this picture to simply show the transition between the 2 sides of the room. On top of the little carts are my sprays and masks and little jars of some chochkys that wouldn't fit elsewhere. 


 This side looks bare, I know. I plan to do white corner shelves from the desk up to the ceiling. At that point I will have to find a new place for my dress form. This was one of those MUST HAVES. The two pieces of furniture that you see were sold super cheap to me by one of my GF's. They were a golden oak color and the top of desk was pretty beat up. I sanded, stained, and poly-urithained all three pieces. (the third piece holds my cricut.  Um...love my MAC and my large format printer.


I would love to say that I was thrifty and purchased this frame at Goodwill or something...but no. I was stupid and bought it at Joanne's during a sale. The corkboard is quilted and I made the buttons myself. Another piece of advice...double up the roll up cork. One roll was not enough to do a double layer over the entire thing and the pushpins don't have enough to grab onto through the quilt batting. I had enough to double in the center and they tend to hold nice there. Oh well...live and learn.


 Here is my cricut station. My desk faces this. The cabinets and cubes were custom hung by hubby. The cubes were purchased from Oriental Trading and are super flimsy. They were never meant to hang and would have fallen apart. Hubby has a giant metal ledge mounted to the wall in the back, and then a giant piece of re-rod that in the front and bolted to the two cabinets. The sides of the cubes are attached to the cabinet and each other. I hid the re-rod with a piece of discount trim from Home Depot. He keeps asking if the thing feels like it's going to fall and I just laugh. I could probably dance on top of the thing and it would hold me. It's going NO WHERE.


Just a perspective photo with the center of the room. LOVE my chandelier. Also made the corkboards on the front of the cabinets and mounted them with adhesive.


Inside the dresser are my inks...


punches, brads, and gypsy. I also keep all my cartridges in the second drawer and a bunch of computer supplies like DVD's, CD's, and my gypsy plugs and cords. 


If you are planning your own room I strongly recommend going online and saving pictures of what you like and don't like. Get ideas of what you want to do where. Thanks for looking. Happy scrapping!!

Friday, March 25, 2011

After long hours and much anticipation...

Yes, that's right...my first Swirlydoos page is finally done. This kit was from March and is called Cabaret. I LOVED it. There were so many gorgeous papers that it was difficult to decide which ones to use in order to create my page for the sketch challenge. I even got to use some stuff that I bought on a whim way long ago and have been dying to find the right use for. 

This is a picture of my son Colin. I took the picture at the mall in December 2009 while I was playing with my camera. The picture was so dark it looked black but I knew there was a gem hidden within. During my recent photoshop class I altered the color, blurred the background, and cropped. The slight wash out of color was perfect to go with the dusty blue's in this kit.


The flowers were cut from the Tim Holtz accordion flowers die run through a Big shot. I couldn't bring myself to cut the gorgeous papers into flowers so I used the background stamp that came with the kit and did a bunch of ink blending with Tim Holtz distress inks. The butterfly is actually from a previous download through Swirlydoos. I used liquid glass, some black Stickles, and curled the wings. I took the liberty of removing the antenna. They are way too complex to cut out and I don't have any wire, so this butterfly is NOT anatomically correct.


My hinges turned out FANTASTIC!! Yes, they took me all day at the crop last Saturday but were oh so worth it. I used the tutorial over at Swirlydoos for making rusty hinges. I have some hinge stamps from my previous kit club Scrapgoods and I stamped and cut them out of chipboard. Then I punched the holes and followed the rest of the tutorial. I also used distress ink over the paint, before the distress powder so that it grunged them up just a bit more and I added an extra step of spraying with patina glimmer mist. I gotta say, the tad bit of shimmer is fabulous. The vines were purchased in the floral section at Michael's for 50% off. Score one for the thrifty scrapper.


That piece that I purchased and had forever...this is she. Isn't it awesome? It was some sort of jewelry making line at Jo Anne's that had an Alice in Wonderland theme. It's one long chain and they are a beautiful pewter.  I have yet to find another item that was this cool. This was an excellent find. You can also see some of the paper distressing. I really enjoy the way that turns out and with these really thick heavy papers they end up looking like fabric when they are done.


I had to show the ticket because I am just so proud of the ticket. Yes, it's just a plain ol' raffle ticket. I used coffee and patina glimmer mists to grunge it up a tad. It's been in my stash for a while. I love being able to use stuff like this on my page. I have  TONS of it and plan on digging in and making use of what I have saved much more in the future.
Thanks for looking

Magical Mica flowers

This is a wonderful tutorial using Magical Micas. The video is posted to Youtube by Lindysgang and is just a wonderful tutorial for these gorgeous flowers. I ran across this while looking for ways to use some mica powders that had been sitting in my scrap room unused for the last 5 years or so...imagine my surprise when I realized just what a gem I had been sitting on for so long! Enjoy the tutorial.

P.S. My most recent swirlydoos page will be posted soon. It's my first one! I am so excited.

Monday, March 21, 2011

Then and Now...my progression in scrapbooking

I know, I know, it's almost been a month since my last post. I've been a busy scrapper and a busy momma. My DH turned 32 last weekend and I had to clean the house before everyone came over. I know you all understand EXACTLY what that means.

I also started a photoshop class on Tuesday nights. Let me explain, see my sweetheart got me PSE8 for Christmas 2009. Yes, 2009. Our PC was incredibly outdated and old but I was going to see if I could load the program anyway. At this point it was February 2010. After 5 hours of frustration and loading and reloading software I pick up the box and inspect it thoroughly for approximately the 100th time and realize...the side of the box says MAC OS. I thought this was a photoshop thing originally but for whatever reason, at 12:30 AM on a Sunday night the realization hits that I am holding software for a MAC!!! Yes girls, the blonde is real...just not natural. I also realize that my PC will not run this software due to the lack of a decent graphics card. By the end of March I had my new iMac and PSE8 was loaded and ready to go;) I was so excited. I will not regale the hours of clicking and searching, nor the tears and colorful words that followed, but suffice to say that I was ready to give Adobe a piece of my mind. It was now Winter again and I couldn't even figure out how to pull a photo in. Once I got that down I could not figure out how to keep my tool bars. You may be thinking that I am an idiot. Wait, I'm not done. My sister sat here with me over Christmas one afternoon and taught me some basics. (she is a graphic design artist) Even she was getting frustrated but by the end but I felt a little more comfortable. After New Year's I sat down alone once again to give it a try and was back to tears.  I had no tabs on the upper right! Forget the tutorials online, half my stuff was missing and could not be found in the menus so the tutorials were useless. I couldn't figure out what they were talking about. I called Adobe who told me it would cost me $40 for help with this. I sighed in frustration and told the man, "answer me this. Should I consistently have tabs on the right side of my screen?"  His answer was "yes, you should always have the 'create' and 'share' tabs on the right side of your screen. I then made the executive decision to completely uninstall the software and reinstall it. In Ozzy's own words "No more tears"  :)

I thought about purchasing a notebook for the class but instead decided to make my own. This is the cover. It's done in K and Co Que Sera pattern. I used the Tattered Angels glimmer mists and mask for the gate. I used perfect pearls with a pattern stamp by Prima on the letters down the left.
 This is the back. It's just a tad larger than 12 inches so I painted, glimmer misted and added the border.

 Here's a close up of the letters with the stamp.
 Here you can see the different colors of glimmer mis used on the top of the cardboard.
 I cut the marque out on my Cricuit and Modge Pode'd it together.
 I made the pocket on the inside using masking tape. I put the pocket on before the front. I have pages from magazines that have various tutorials there behind the notebook paper. I need to tab the different sections so they are easy to find.
 I LOVE this technique. There is a tutorial on Swirlydoos.com.  This is just a regular transparency and some pearlized puff pain. Since I mimicked a Prima "say it with crystals" swirl I used magenta pink glitter glue in place of the crystals.
It may not look like much but this notebook took me a couple of weeks to finish and I still need to tab it!

I went to an all day crop on Saturday. This page has been in progress since the beginning of February. At the crop on Saturday I decided enough was enough and this page was finito!
The title is "Liam sometimes you are 2 cool 4 words"  This is my youngest son Liam in front of our house last Summer. Yes, he's a bit of a ham.

This is a stamp that I colored with Copic markers and trailed with iridescent seed beads. I was really happy with the way this turned out. The stamping on the photo is done with a transparency and Stazon ink.

Ok, can I just say that I adore bottle caps?! My GF at the crop asked me if it was a kit from Michael's. I flipped it over to show her the Killian's label!! I had my DH save a bunch for me a long time ago and they have been sitting in my scrap room. I loved the little red wagon but with just a touch of liquid glass you have an ADORABLE accent for your page. Don't forget to hammer the edges down and flatten it just a tad.
 This number was inspired by letter stickers my GF Sandy had brought. I know it's difficult to see the glitter but the 4 is actually raised with pop dots and the black is all sparkly. She had a sticker set that was actually giltter on the top and solid shadow but it provided the inspiration that I needed for the number here. See the safety pin holding the tab? Yeah, we're not gonna go there.
 I thought Stazon would be a lot more Opaque on transparency than it is. My bad. I traced the letters with  zig but it really didn't cut it. I do like the transparent look but it's a tad difficult to see. I think it's cool how the hand stitching at the top still shows through and all the rocket ships on the paper.

And now for the grand finale!!!
At my sister's request, this is my very first scrapbook page ever! Yes, there are fish on a duck hunting page. Vintage right? I got started with stamping up and bought white cardstock, color cardstock, one versatile stamp set, and my album. I had to make my own pattern paper. Although my stamp set was versatile, it wasn't THAT great:) As every scrapper I know I could really do so much better now but there is just something about it like I would be changing history if I took it apart now. Obviously I know much better now what to do with die cuts. Would love for others to share your first page. Don't know if you can load pics in remarks but if now, put it on your page and leave a remark about your first page ever. Here's to 8 years of scrappin'. Slante'